Client2Door User Guide
Who is this guide for?
Client2Door is built for small business owners who run recurring delivery or subscription services in Singapore — such as meal kit boxes, pastry subscriptions, or monthly packages — and who prefer the speed of a Command Line Interface (CLI) over clicking through menus.
If you find yourself juggling a growing list of subscribers, tracking which boxes need to go out, and coordinating drivers for dispatch, Client2Door is designed to make that faster and less error-prone.
This guide assumes you:
- Are comfortable typing commands (no prior CLI experience required — this guide will walk you through it)
- Have basic familiarity with using a computer and file explorer
- Do not need a background in software or programming
What problem does Client2Door solve?
Managing recurring orders in a spreadsheet gets messy fast — you lose track of who has which box, when subscriptions expire, and who is delivering to whom. Client2Door gives you a single, fast interface to:
- Manage your subscriber list — store each subscriber's contact details, delivery address, and remarks (e.g. "leave at door", "allergic to nuts")
- Track subscription boxes — assign one or more boxes to each subscriber with expiry dates and delivery statuses
- Deploy drivers efficiently — split your subscriber list across drivers with a single command, then export a ready-to-share delivery schedule
Table of Contents
- Quick Start
- Key Concepts
- Features
- Command Format Notes
- Viewing help —
help - Adding a subscriber —
add - Adding boxes —
addbox - Listing all subscribers —
list - Editing a subscriber —
edit - Editing a box —
editbox - Updating a remark —
remark - Finding subscribers —
find - Deleting a subscriber —
delete - Deleting boxes —
deletebox - Marking delivery status —
mark - Filtering subscribers —
filter - Assigning drivers —
assign - Exporting assignments —
export - Importing subscribers —
import - Clearing all entries —
clear - Exiting —
exit
- FAQ
- Known Issues
- Command Summary
- Appendix: Installing and Running Client2Door
Quick start
Installation
Ensure you have Java
17installed on your computer. Follow the guide for your operating system:- Windows: Java 17 Installation Guide for Windows
- Mac: Java 17 Installation Guide for Mac (follow this guide exactly — the version matters on Mac)
- Linux: Java 17 Installation Guide for Linux
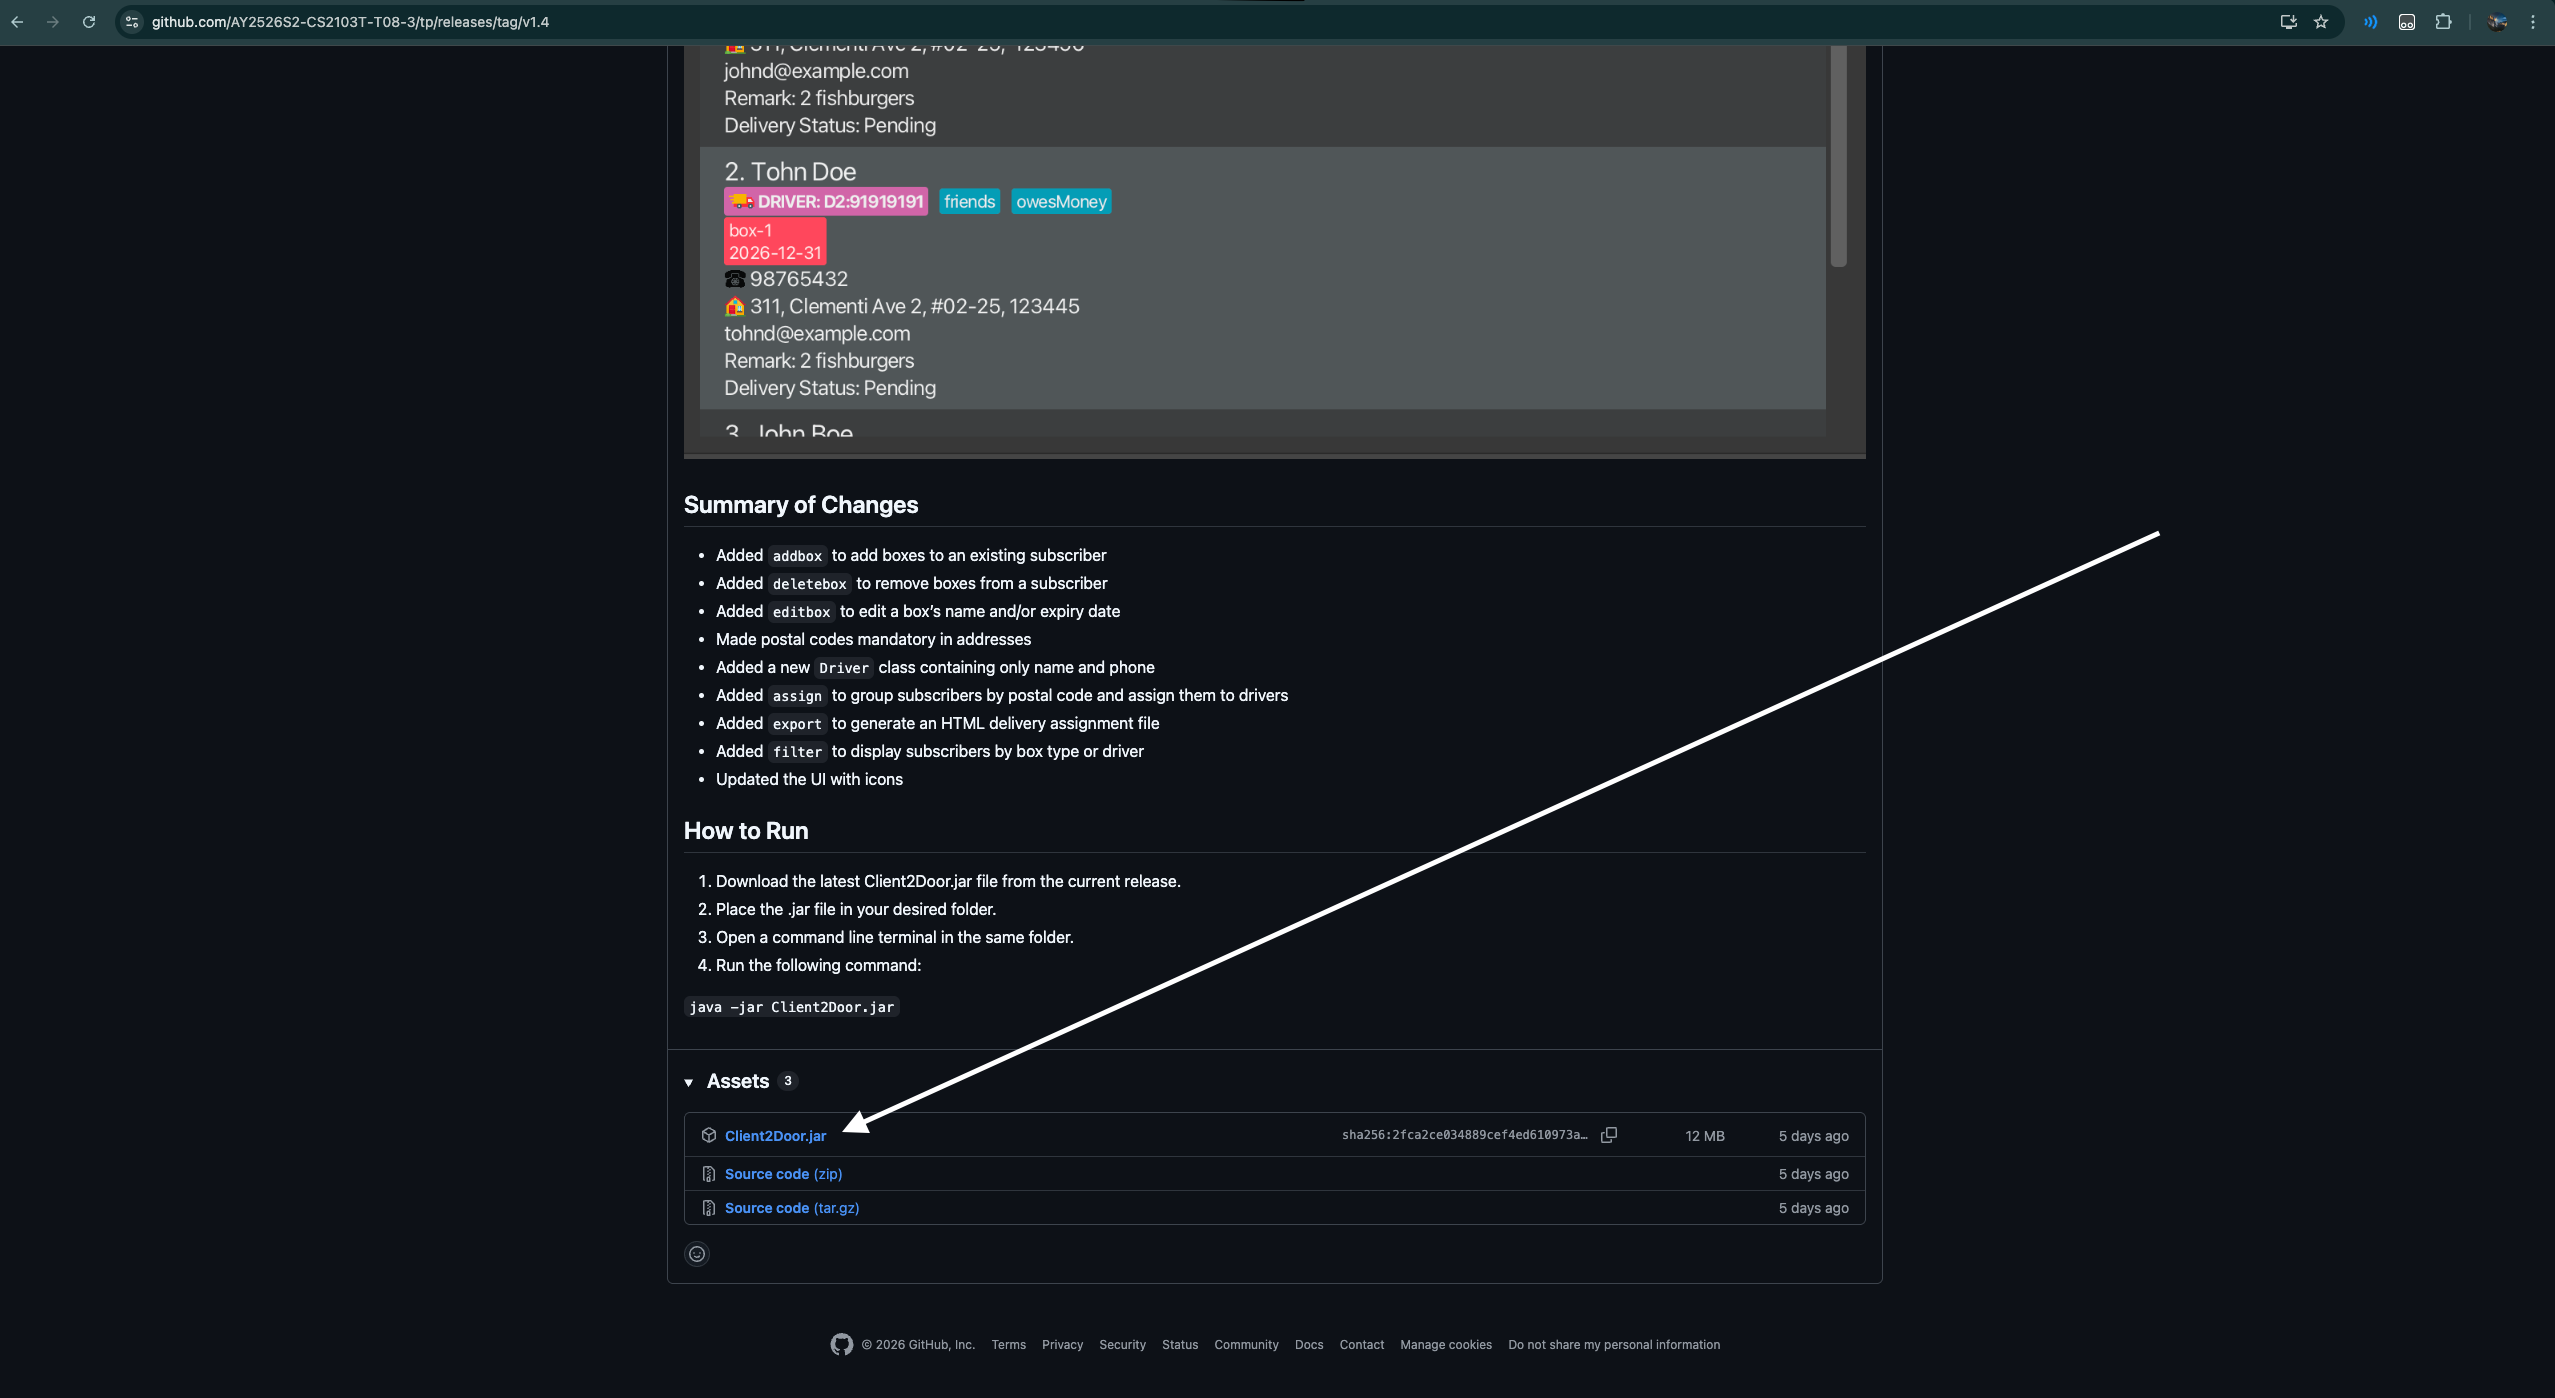
Download the latest
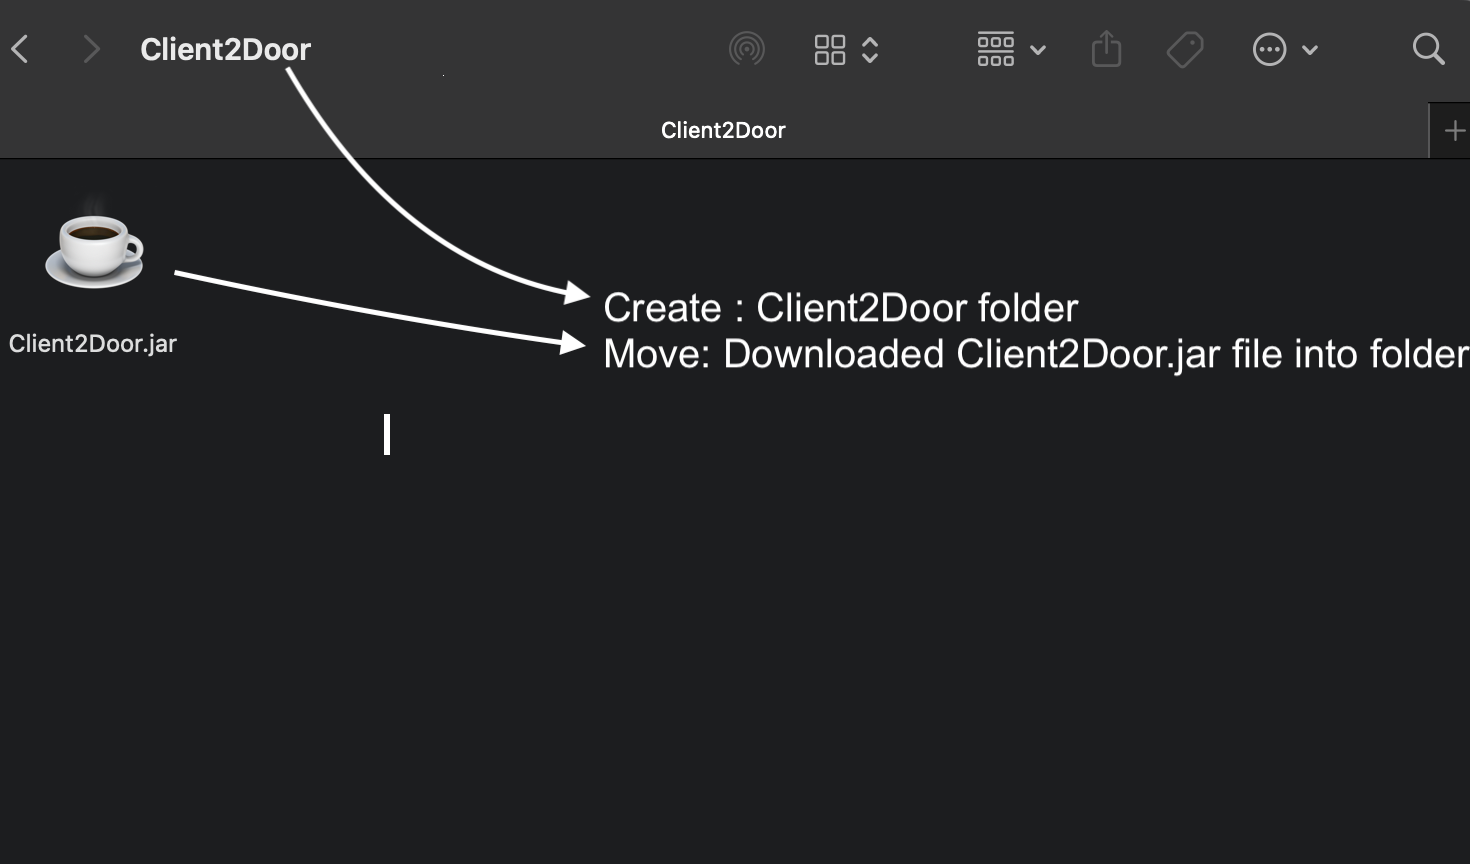
Client2Door.jarfile from here.Create a folder anywhere on your computer (e.g.
C:\MyBusiness\Client2Dooron Windows, or~/Client2Dooron Mac) and move the.jarfile into it. This folder will store all your data.Open a terminal:
- Windows: Press
Win + R, typecmd, press Enter - Mac: Open Spotlight (
Cmd + Space), typeTerminal, press Enter
- Windows: Press
Navigate to your folder using
cd. For example:cd C:\MyBusiness\Client2DoorRun the app:
java -jar Client2Door.jarThe app window should appear within a few seconds, preloaded with sample data.
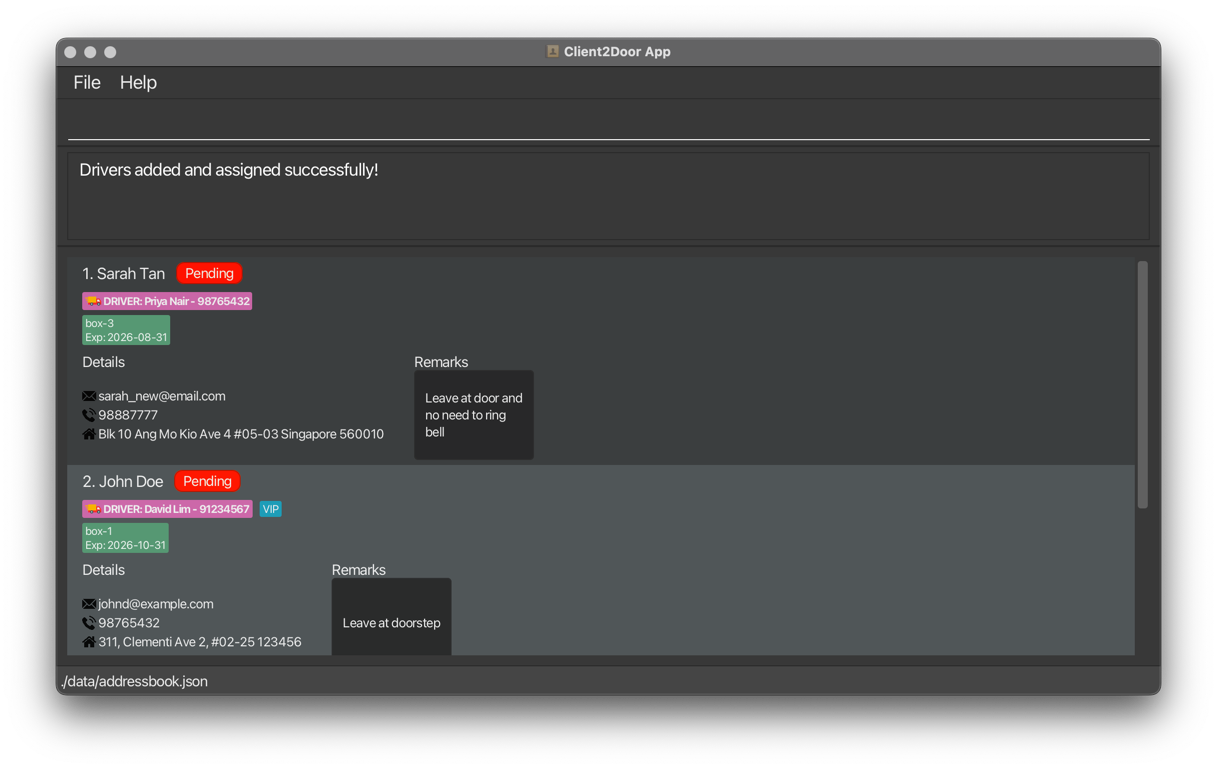
Understanding the interface
The app window has three main areas:
| Area | Location | Purpose |
|---|---|---|
| Command Box | Top | Where you type commands and press Enter to run them |
| Output Display | Middle | Shows feedback from your last command: success confirmations or error messages |
| Result Panel | Bottom (scrollable) | Displays the results of your command: your subscriber list, search results, or filtered views |
Your first CLI tutorial
If you have never used a CLI before, follow these steps to get familiar with Client2Door before managing your real data.
Step 1 — Add a subscriber
Type the following into the command box at the top and press Enter:
add n/Tom Baker p/91234567 e/tombaker@email.com a/123 Orchard Rd Singapore 238888 b/box-1:2
The middle output panel will confirm the subscriber was added. Tom Baker will appear at the bottom of the result panel with a Pending delivery status and one box.
Step 2 — View your full subscriber list
list
The result panel shows all subscribers. Each subscriber has an index number on the left — the subscriber at the top is always index 1, the next is 2, and so on down the list. Since Tom was just added, he will appear at the bottom with the highest index number.
Note: Index numbers are positional and update with every command refresh — they reflect the current position in the result panel, not a fixed ID.
Step 3 — Find a subscriber
find Bernice
The result panel filters to show only subscribers whose names contain "Bernice". The output panel confirms how many results were found. Run list to return to the full view.
Step 4 — Mark a delivery
Run list to see all subscribers and note Tom Baker's index number at the bottom. Then mark his delivery using that index — for example, if Tom is index 9:
mark 9 delivered
Tom's status updates to Delivered in the result panel. The output panel confirms the change.
Step 5 — Delete the test entry
Run list to see all subscribers and note Tom Baker's index number at the bottom. Then delete him using that index — for example, if Tom is index 9:
delete 9
Tom Baker is removed. The output panel confirms the deletion. You are now ready to manage your real subscribers.
Key Concepts
Before using Client2Door, it helps to understand three core ideas:
Subscriber: A subscriber is a customer who receives regular deliveries from your business. Each subscriber has:
- A Name
- Phone number
- Delivery address
- At least one Box (subscription package)
- An optional remark (e.g. delivery preferences or notes).
Note:
Namecan only have alphabetic characters, hyphens, apostrophes and spaces. (Excluded slashes to prevent incorrect parsing)
Addressis validated by finding a 6-digit postal code, with the Singapore context kept in mind!
Box:
A box represents a single recurring delivery package assigned to a subscriber. Each subscriber must have at least one box. Boxes have a name in the format [type]-[number] where the type uses underscores for multi-word names (e.g. box-1, pastry-2, meal_kit-1) and an expiry date — after which the subscription is considered lapsed. A subscriber can hold multiple boxes if they have ordered more than one package.
Note:
Orders are fulfilled starting the following month of a box's addition. Therefore, a one-month subscription made in the current month will be delivered the following month and expire at the end of the month.
Delivery Status: Every subscriber has a delivery status that reflects where their order is in the fulfilment process:
Pending— order received, not yet packedPacked— box is packed and ready for dispatchDelivered— box has been delivered to the subscriber
Features
Notes about the command format:
Words in
UPPER_CASEare the parameters to be supplied by you.
e.g. inadd n/NAME,NAMEis a parameter which can be used asadd n/John Doe.Items in square brackets are optional.
e.g.n/NAME [t/TAG]can be used asn/John Doe t/friendor asn/John Doe.Items with
…after them can be used multiple times including zero times.
e.g.[t/TAG]…can be used as(i.e. 0 times),t/friend,t/friend t/familyetc.Parameters can be in any order.
e.g. if the command specifiesn/NAME p/PHONE,p/PHONE n/NAMEis also acceptable.Extraneous parameters for commands that do not take in parameters (such as
help,list,exitandclear) will be ignored.
e.g. if the command specifieshelp 123, it will be interpreted ashelp.If you are using a PDF version of this document, be careful when copying and pasting commands that span multiple lines as space characters surrounding line-breaks may be omitted when copied over to the application.
Parameter reference:
| Prefix | Parameter | Description |
|---|---|---|
n/ | NAME | Full name of the subscriber |
p/ | PHONE | Contact number — digits only, at least 3 digits, must not start with 0 |
e/ | EMAIL | Email address |
a/ | ADDRESS | Delivery address |
b/ | BOX_NAMEMONTHS_SUBSCRIBED | Box name and number of months until subscription ends; At least 1 box subscription required |
nb/ | BOX_NAME | New box name — only used in the editbox command |
r/ | REMARK | Optional delivery note — defaults to No remark if omitted |
t/ | TAG | Optional tag(s) — can be repeated |
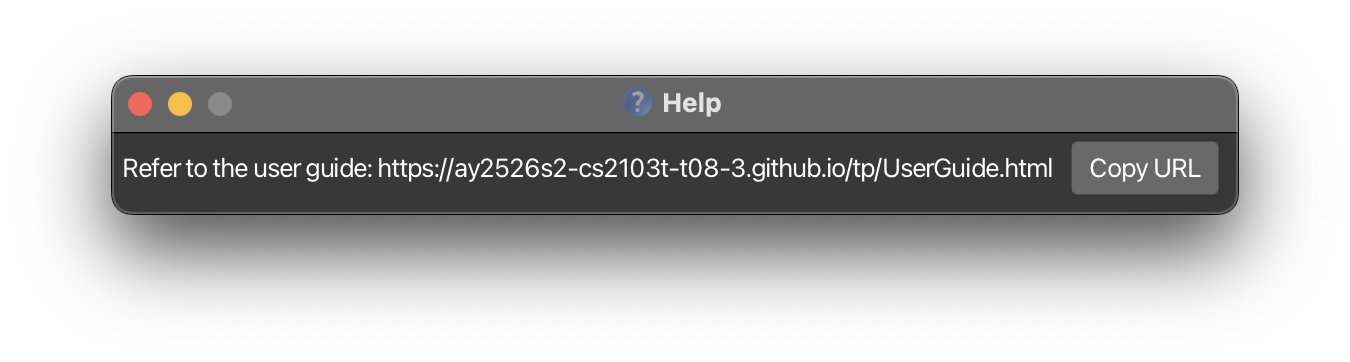
Viewing help : help
Shows a link to this user guide.
Format: help
Expected output: A help window appears with a link to the online user guide.
Adding a subscriber : add
Adds a new subscriber to Client2Door.
Format: add n/NAME p/PHONE e/EMAIL a/ADDRESS b/BOX_NAME:MONTHS_SUBSCRIBED [r/REMARK] [t/TAG]…
Tip: Add multiple boxes in one command by repeating
b/. You can always add more boxes later withaddbox.
Note: The subscriber's delivery status is automatically set to
Pendingwhen first added.
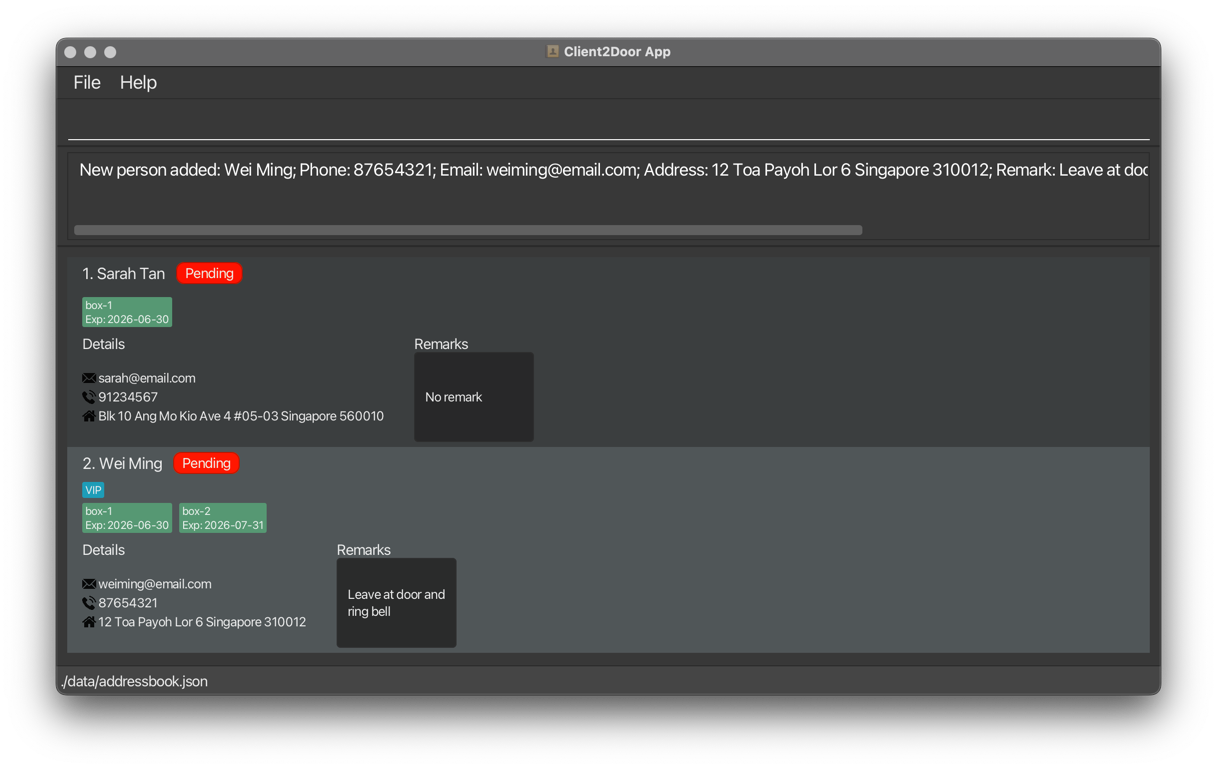
Examples:
add n/Sarah Tan p/91234567 e/sarah@email.com a/Blk 10 Ang Mo Kio Ave 4 #05-03 Singapore 560010 b/box-1:2add n/Wei Ming p/87654321 e/weiming@email.com a/12 Toa Payoh Lor 6 Singapore 310012 b/box-1:2 b/box-2:3 r/Leave at door and ring bell t/VIP
Expected output: The subscriber appears in the result panel at the bottom, and the output panel confirms:
Listing all subscribers : list
Shows all subscribers currently in Client2Door.
Format: list
Tip: Run
listafter usingfindorfilterto return to the full subscriber view.
Expected output: All subscribers appear in the result panel. The output panel shows: Listed all persons.
Editing a subscriber : edit
Edits the details of an existing subscriber.
Format: edit INDEX [n/NAME] [p/PHONE] [e/EMAIL] [a/ADDRESS] [r/REMARK] [t/TAG]…
- The
INDEXrefers to the number shown next to the subscriber's name in the current list. It must be a positive integer (1, 2, 3, …). - At least one field must be provided.
- When editing tags, all existing tags are replaced — editing tags is not cumulative.
- To remove all tags, type
t/with nothing after it. - To clear remark, type
r/with nothing after it. - To update just the remark, you can also use the dedicated
remarkcommand. - See also:
editboxto change box names or expiry dates.
Examples:
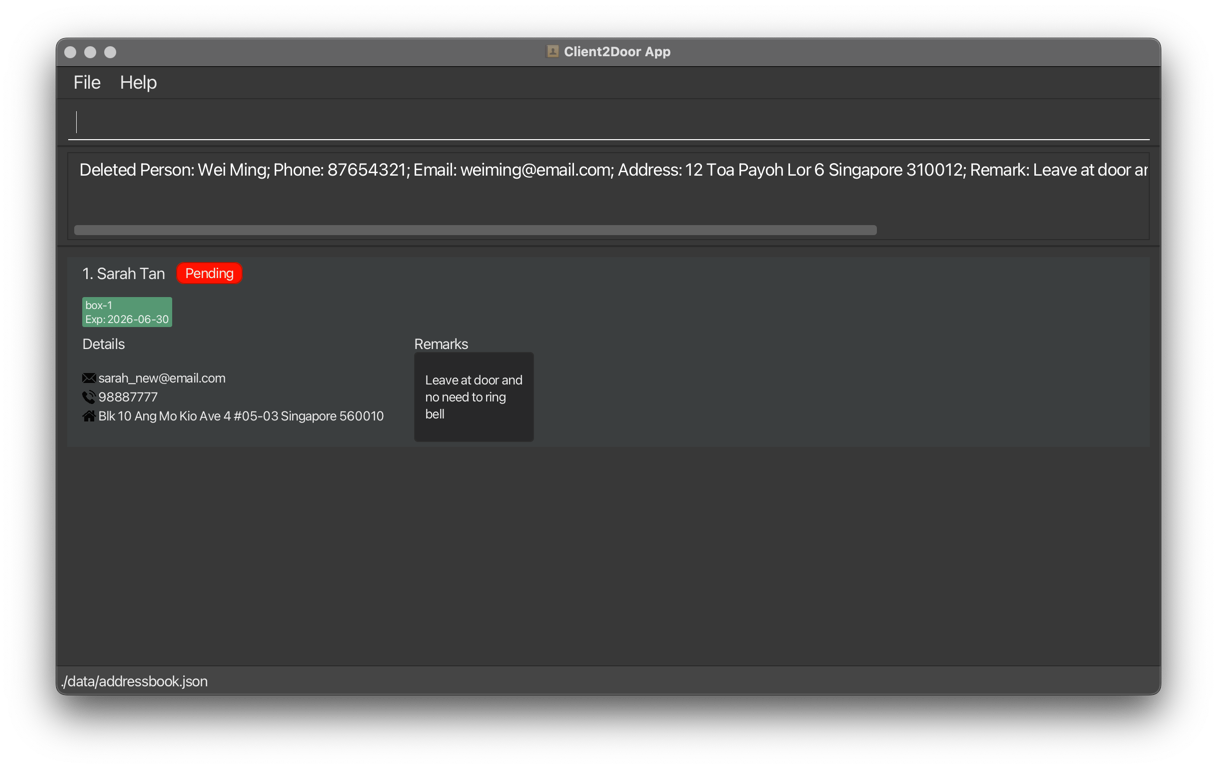
edit 1 p/98887777 e/sarah_new@email.com— updates the phone and email of subscriber 1.edit 2 a/50 Jurong West Ave 1 Singapore 649520 r/prefers afternoon delivery t/— updates address and remark for subscriber 2 and removes all tags.
Expected output: The output panel confirms the edit and shows the subscriber's updated details. The subscriber list resets to show all subscribers.

Updating a subscriber's remark : remark
Updates the delivery remark for a subscriber.
Format: remark INDEX r/REMARK
- The
INDEXrefers to the number shown next to the subscriber in the current list. It must be a positive integer (1, 2, 3, …). - Only one
r/prefix is allowed — providing multipler/prefixes in the same command is an error. - You can also update remarks via
editusing ther/prefix.
Tip: Use remarks for delivery-specific notes like "ring doorbell", "leave at guardhouse", or "call before arriving".
Examples:
remark 1 r/leave at door and no need to ring bellremark 2 r/allergic to nuts
Expected output: The output panel confirms the remark has been updated. The subscriber list resets to show all subscribers.

Finding subscribers : find
Filters the subscriber list to show only subscribers whose names match the given keywords.
Format: find KEYWORD [MORE_KEYWORDS]…
- Search is case-insensitive:
sarahmatchesSarah. - Keyword order does not matter:
Tan SarahmatchesSarah Tan. - Only full words are matched:
Sarwill not matchSarah. - Returns all subscribers matching at least one keyword (OR search).
Tip: Use
findbeforedeleteoreditto locate the right subscriber and confirm their index number before making changes.
Examples:
find Sarah— returns all subscribers named Sarah.find Sarah Wei— returns subscribers named Sarah or Wei.
Expected output: The list filters to matching subscribers. The output panel shows how many were found.
Run list to return to the full subscriber view.
Deleting a subscriber : delete
Permanently removes a subscriber from Client2Door.
Format: delete INDEX
- The
INDEXrefers to the number shown next to the subscriber's name in the current list. It must be a positive integer (1, 2, 3, …).
Warning: Deletion is permanent and cannot be undone. Use
findto confirm you have the right subscriber before deleting. Consider runningexportbefore bulk deletions to save a copy of your data.
Warning: Deleting a subscriber clears all driver assignments for every subscriber. Re-run
assignafter deleting if driver assignments are needed.
Examples:
listthendelete 2— deletes the 2nd subscriber in the full list.find Sarahthendelete 1— deletes the first result from the search.
Expected output: The subscriber is removed from the list. The output panel confirms the deletion.
Marking delivery status : mark
Updates the delivery status of a subscriber. Delivery status tracks where a subscriber's order is in the fulfilment cycle:
Pending— order received but not yet preparedPacked— boxes have been packed and are ready for dispatchDelivered— order has been delivered to the subscriber
Status does not reset automatically — it must be updated manually using this command.
Format: mark INDEX STATUS
- The
INDEXrefers to the number shown next to the subscriber in the current list. It must be a positive integer (1, 2, 3, …). STATUSmust be one of:pending,packed, ordelivered(not case-sensitive).
Tip: Use
markas you progress through your fulfilment workflow — mark aspackedonce boxes are ready, thendeliveredafter drop-off. This keeps your list up to date for driver coordination.
Examples:
mark 1 packed— marks subscriber 1 as Packed.mark 2 delivered— marks subscriber 2 as Delivered.mark 3 pending— resets subscriber 3 back to Pending.
Expected output: The subscriber's status updates in the list. The output panel confirms the change. The subscriber list resets to show all subscribers.
Filtering subscribers : filter
Narrows the result panel to show only subscribers matching a box type or an assigned driver.
Format: filter BOX_NAME [MORE_BOX_NAMES]… OR filter d/DRIVER_NAME [d/MORE_DRIVER_NAMES]…
- At least one of
BOX_NAMEord/DRIVER_NAMEmust be provided. BOX_NAMEfilters by the box type subscribers have (e.g.box-1).d/DRIVER_NAMEfilters by the driver assigned to subscribers. Subscribers are assigned to drivers using theassigncommand.- Subscribers matching at least one of the provided filters will be shown.
- Run
listto return to the full subscriber view.
Tip: Use
filter d/DRIVER_NAMEafter runningassignto review exactly which subscribers each driver is responsible for before exporting.
Examples:
filter box-1— shows all subscribers who have abox-1box.filter d/David Lim— shows all subscribers assigned to driver David Lim.
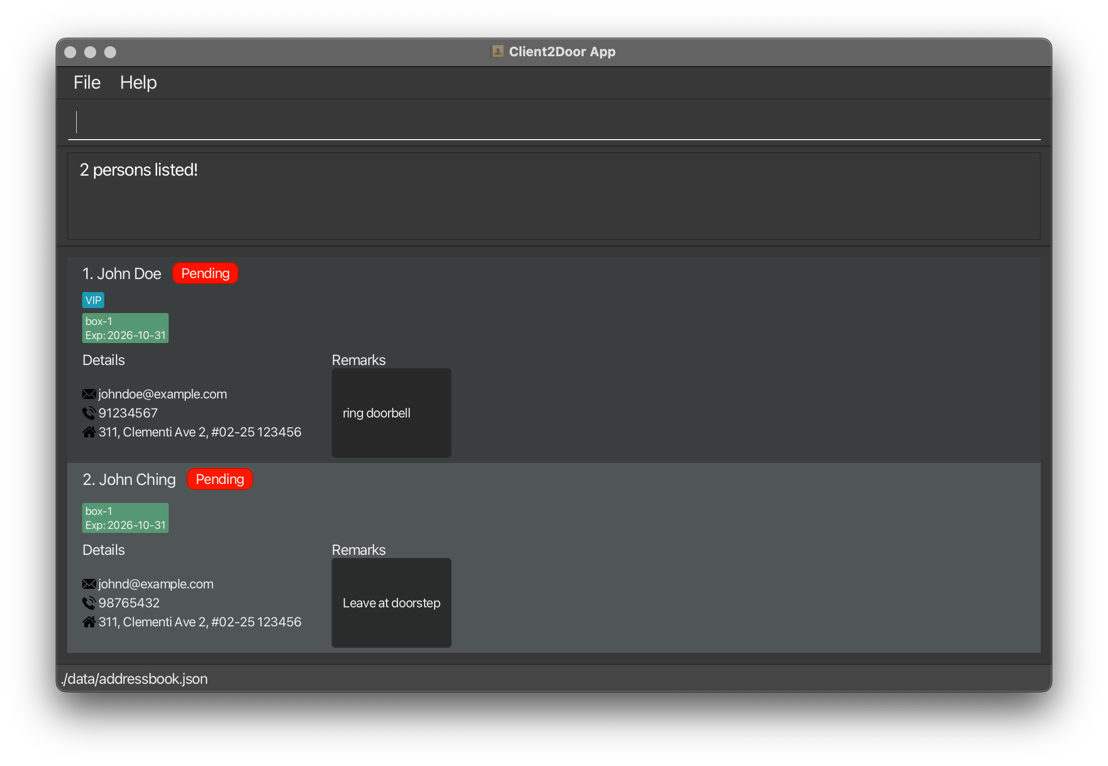
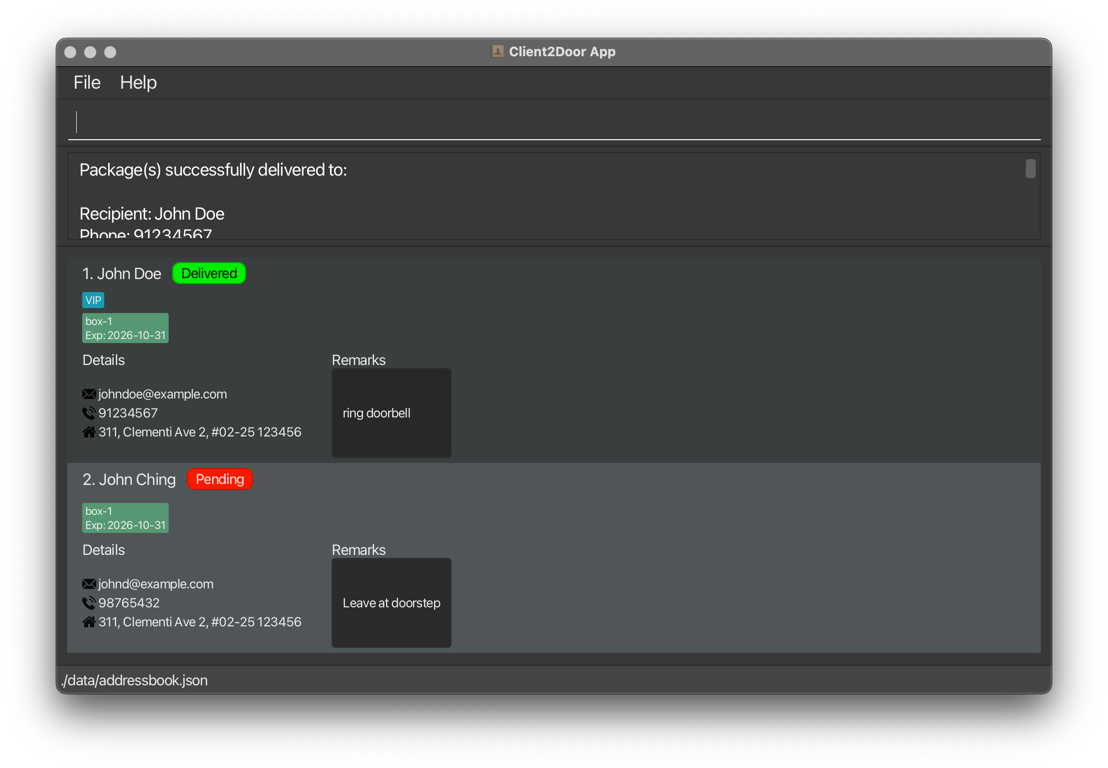
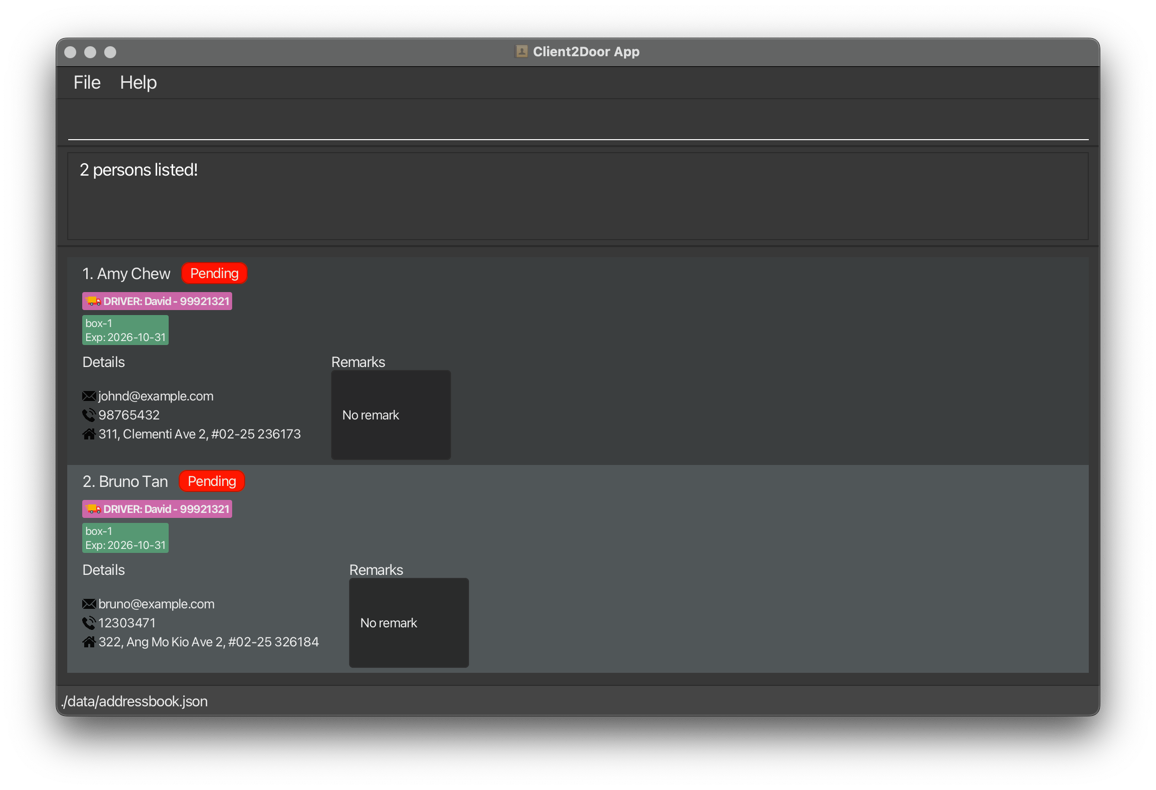
Expected output — filtering by box type:
Before filtering, all subscribers are shown:
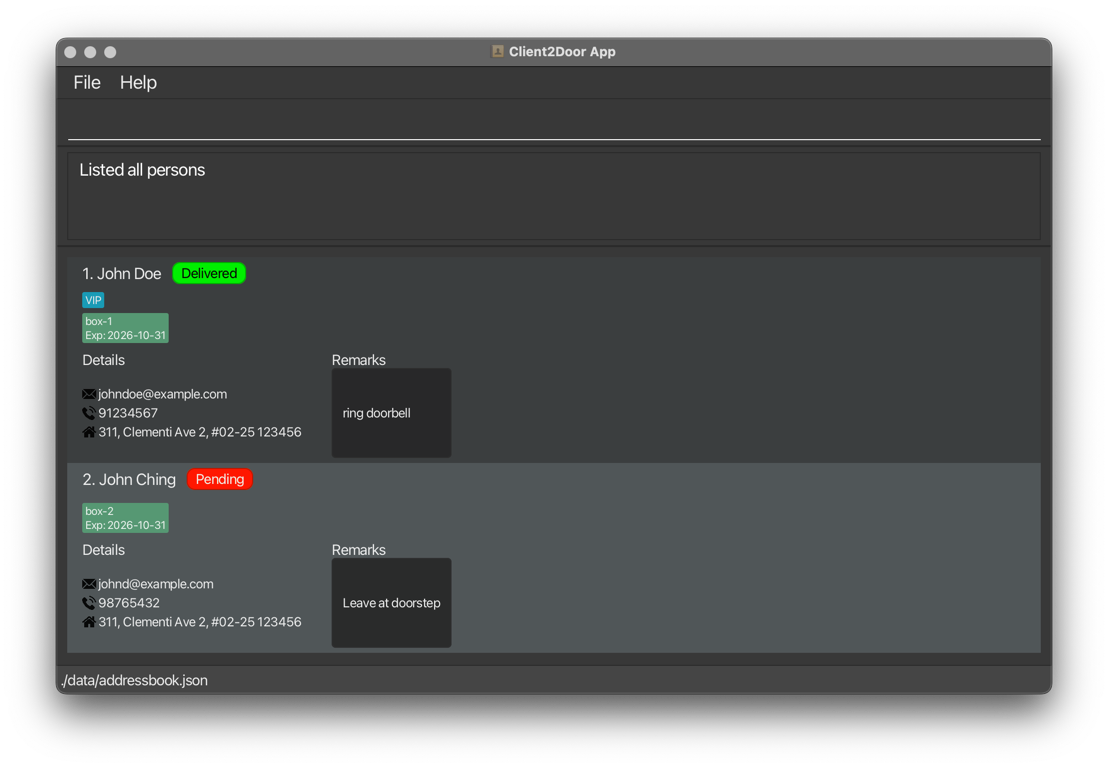
After running filter box-1, only matching subscribers remain:

Expected output — filtering by driver:
Before filtering by driver:
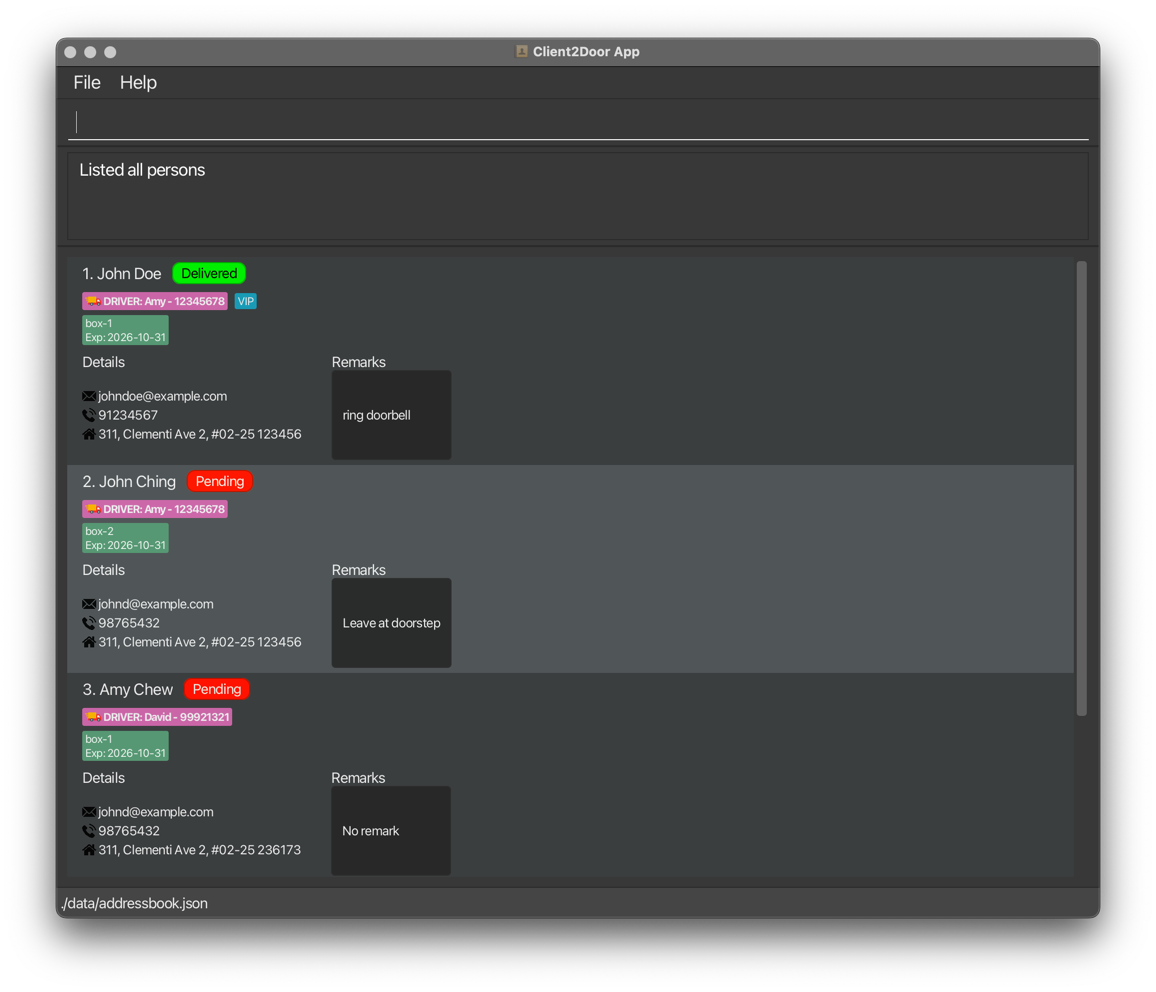
After running filter d/David, only that driver's subscribers are shown:
Adding one or more boxes to a subscriber : addbox
Adds one or more boxes to an existing subscriber.
Format: addbox n/NAME b/BOX_NAME:MONTHS_SUBSCRIBED [b/MORE_BOX_NAME:MONTHS_SUBSCRIBED]…
- The subscriber is identified by their exact
NAMEfrom the currently displayed list. Runlistfirst if the subscriber is not visible. - See also:
addto add boxes when first creating a subscriber.
Tip: Use this command when a subscriber renews or upgrades their order mid-cycle without changing their other details.
Examples:
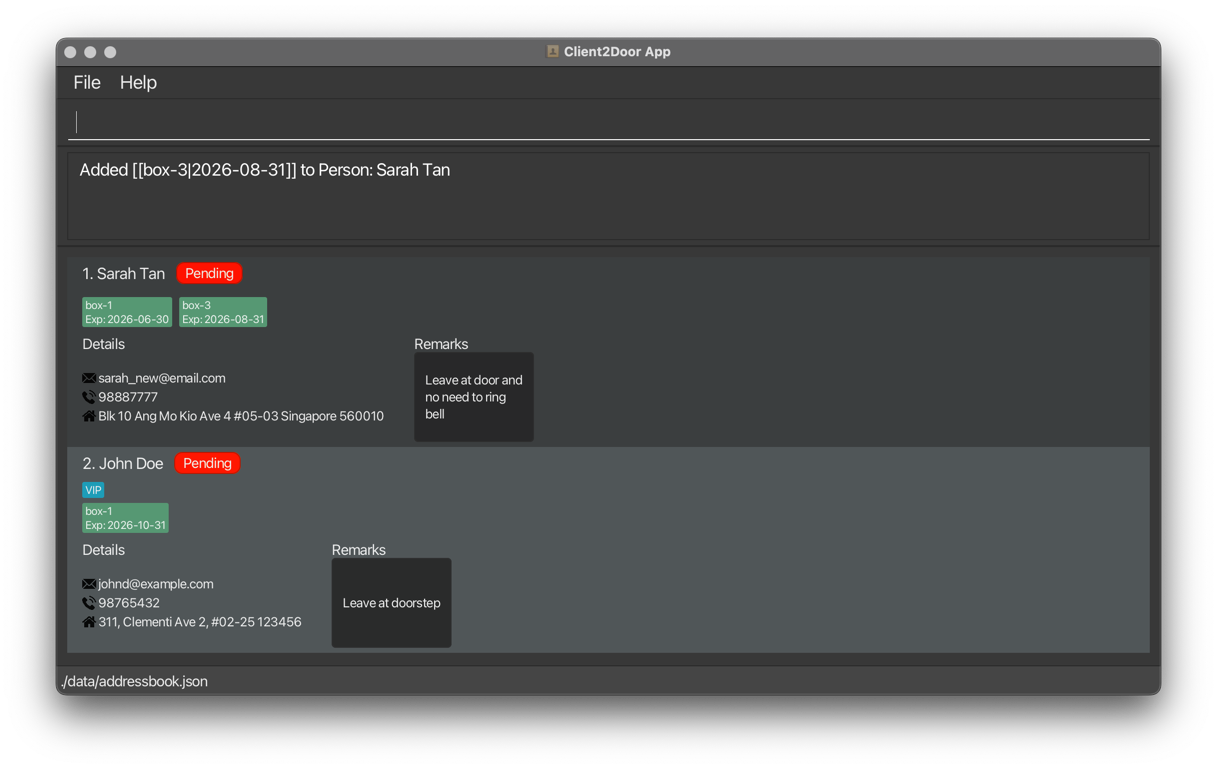
Suppose the current date is 8 April 2026,
addbox n/Sarah Tan b/box-3:4— adds one new box to Sarah Tan, expiring 4 months later, hence with an expiry date of 2026-08-31.addbox n/Wei Ming b/box-3:5 b/box-4:5— adds two boxes to Wei Ming, both expiring 5 months later at 2026-09-30.
Expected output: The output panel confirms the boxes have been added and shows the subscriber's updated details.
Editing a box : editbox
Edits the name or expiry date of an existing box belonging to a subscriber.
Format: editbox n/NAME b/OLD_BOX_NAME [nb/NEW_BOX_NAME] [ex/MONTHS_SUBSCRIBED]
- The subscriber is identified by their exact full
NAMEfrom the currently displayed list. Runlistfirst if the subscriber is not visible. b/OLD_BOX_NAMEidentifies which box to edit.- At least one of
nb/orex/must be provided. - See also:
addboxto add new boxes,deleteboxto remove boxes.
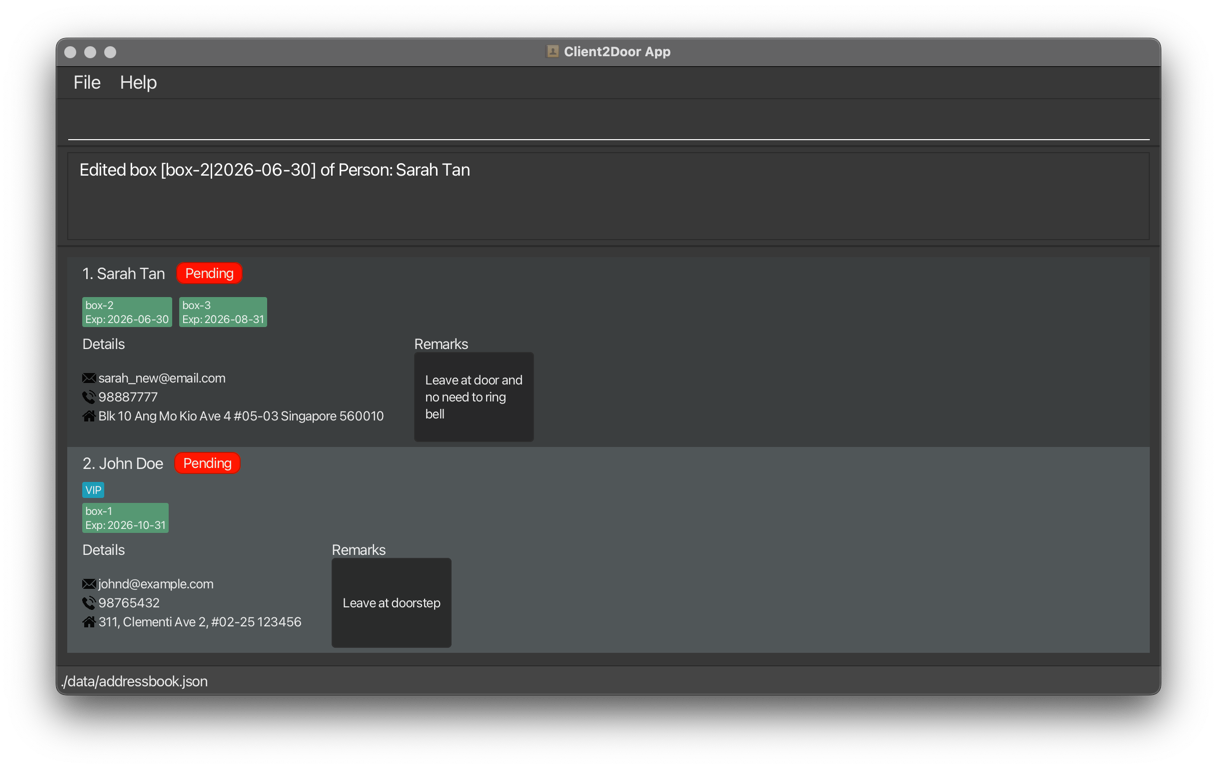
Examples:
editbox n/Sarah Tan b/box-1 nb/box-2— renames the box.editbox n/Sarah Tan b/box-2 ex/3— sets the expiry date to 3 months after the present date.editbox n/Wei Ming b/box-1 nb/box-3 ex/4— renames box AND updates expiry to 4 months after the present date.
Note: Present date here refers to the present date in our time, not the previous expiry date before the edit.
Expected output: The output panel confirms the update and shows the box's new details. The subscriber list resets to show all subscribers.
Deleting boxes : deletebox
Removes one or more boxes from a subscriber.
Format: deletebox n/NAME b/BOX_NAME [b/BOX_NAME]…
- The subscriber is identified by their exact
NAMEfrom the currently displayed list. Runlistfirst if the subscriber is not visible. - At least one box must be specified.
- If there are multiple boxes with the same name specified, only one will be detected. Refer to the example below.
- See also:
addboxto add boxes.
Warning: If you delete all boxes belonging to a subscriber, the subscriber will also be permanently deleted from Client2Door.
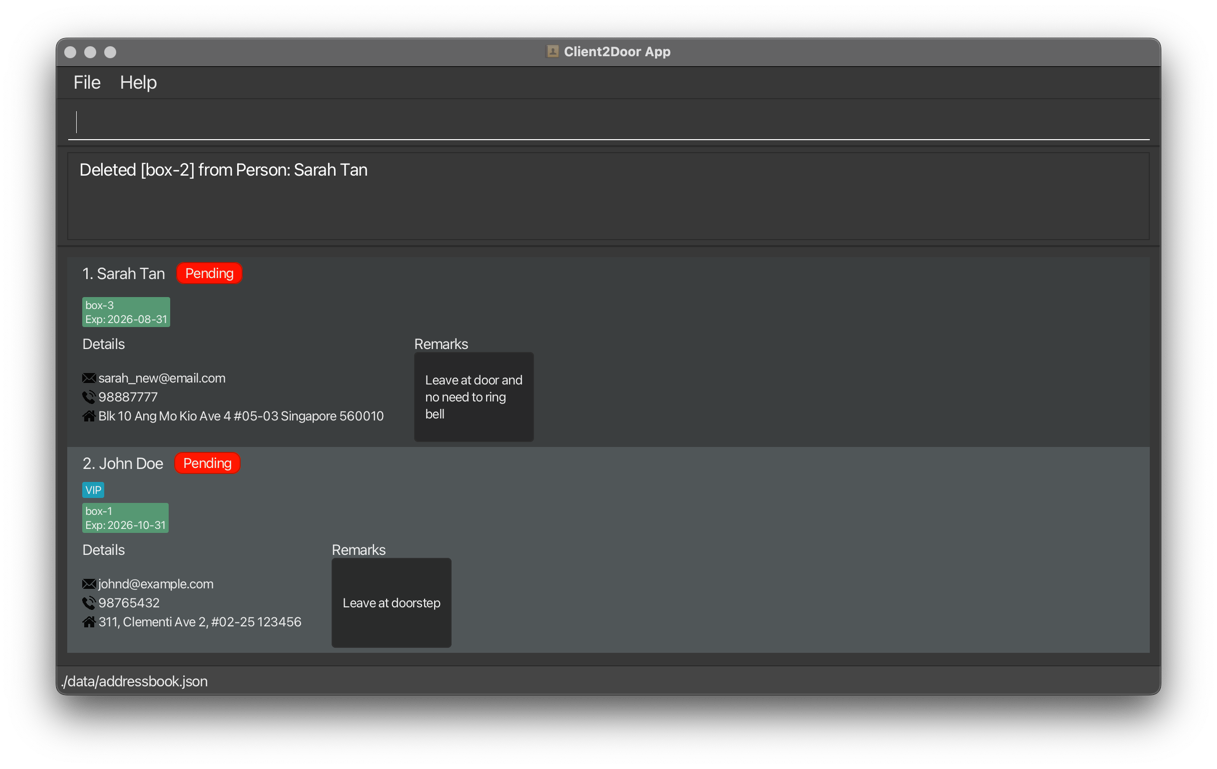
Examples:
deletebox n/Sarah Tan b/box-1— removes one box from Sarah Tan.deletebox n/Wei Ming b/box-1 b/box-2— removes two boxes. If these are Wei Ming's only boxes, Wei Ming will also be deleted.deletebox n/Wei Ming b/box-1 b/box-1— removes only one box, box-1. The secondbox-1will be ignored.
Expected output: The output panel confirms which boxes were removed. The subscriber list resets to show all subscribers.
Assigning drivers : assign
Splits all subscribers in Client2Door into groups and assigns a driver to each group, regardless of what is currently shown in the result panel.
Format: assign n/NAME p/PHONE [n/NAME p/PHONE]…
- Assigns drivers to all subscribers in Client2Door regardless of their delivery status — including those already marked
Delivered. This is intentional so that completed deliveries remain attributed to the driver who fulfilled them. - The number of
n/… p/…pairs determines how many groups are created. Subscribers are divided roughly equally. - Driver phone numbers follow the same rules as subscriber phone numbers — digits only, at least 3 digits, must not start with 0.
- All driver phone numbers and names must be unique within the command (i.e., no two drivers have the same name or same phone number).
- Any existing driver assignment on a subscriber is replaced.
- See also:
exportto generate a shareable delivery schedule after assigning.
Tip: Run
assignat the start of each delivery cycle to redistribute all subscribers across your available drivers for that day.
Examples:
assign n/David Lim p/91234567— assigns all subscribers to David Lim.assign n/David Lim p/91234567 n/Priya Nair p/98765432— splits all subscribers between two drivers.assign n/David Lim p/91234567 n/Priya Nair p/98765432 n/Ali Hassan p/81234567— splits all subscribers across three drivers.
Note: Running the commands that change the number of subscribers (such as
addanddelete) oredit(when address is changed) will clear drivers assignment to ensure the clustering algorithm applies to the full list of subscribers and there is efficient distribution of workload to drivers
Expected output: Every subscriber in Client2Door is tagged with their assigned driver. The output panel confirms how many subscribers were assigned and to which drivers. The subscriber list resets to show all subscribers.
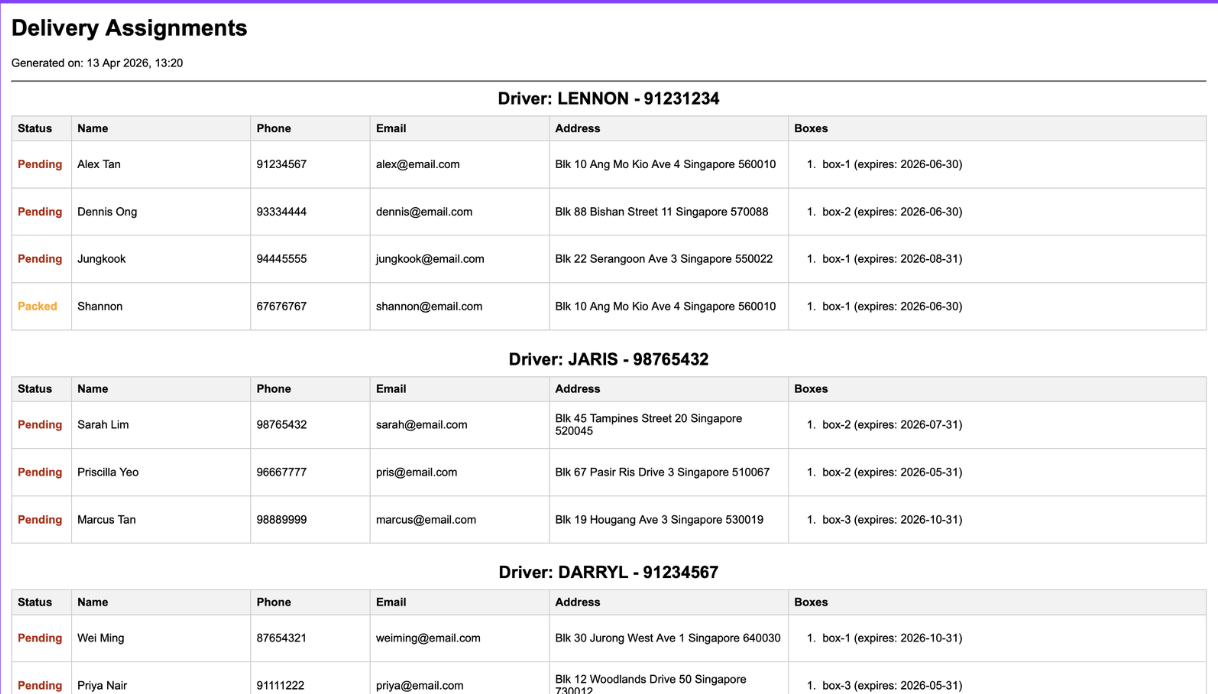
Exporting driver delivery assignments : export
Generates a shareable HTML file listing all drivers and their assigned subscribers.
The HTML file is stored in the data/ folder.
Format: export [FILE_NAME.html]
- If not
FILE_NAME.htmlis provided, the exported HTML will be saved asdelivery_assignments.htmlby default. - Provide only the file name, not a path. For example, use
export april-deliveries.html, notexport data/april-deliveries.html. - If a file with the same name already exists, it will be overwritten.
FILE_NAME.htmlmust end with.html.- Requires all subscribers to have been assigned a driver via
assignfirst.
Tip: Open the exported
.htmlfile in any web browser to view a clean, printable summary. You can share it with your drivers directly.
Warning: If any subscriber is missing an assigned driver, the export will fail with an error message. Run
assignfirst.
Examples:
export— saves todata/delivery_assignments.html.export march-delivery.html— saves todata/march-delivery.html.
Expected output: The output panel confirms the file has been saved and shows the file path.
Importing subscribers : import
Imports subscribers from a CSV file in the data/ folder into Client2Door.
Format: import FILE_NAME.csv
FILE_NAME.csvmust be the name of a CSV file located in thedata/folder of your Client2Door folder.- Provide only the file name, not a path. For example, use
import april-subscribers.csv, notimport data/april-subscribers.csv. - The file name must end with
.csv. - The first row of the CSV file is treated as a header and is skipped automatically.
- Valid rows are imported as new subscribers and added to your existing data.
- Rows with invalid data will be listed with the reason it failed to import
- Imported subscribers start with delivery status
Pending. - Tags cannot be imported from the CSV file.
Warning: The imported CSV file must be generated using this google form template
Tip: Running
importclears all existing driver assignments. Re-runassignafter importing if driver assignments are needed.
Note: Each subscriber can only subscribe to 1 of each type of box to prevent scalping.
CSV format:
Each data row must have at least 9 columns in this order:
| Column | Field | Notes |
|---|---|---|
| 1 | Row index | Any value — not imported |
| 2 | Name | |
| 3 | Phone | |
| 4 | ||
| 5 | Address | Wrap in quotes if it contains commas |
| 6 | Box 1 name | |
| 7 | Box 1 months subscribed | Integer |
| … | Additional box pairs | Repeat columns 6–7 for each extra box (leave blank to skip) |
| 2nd to last | Remark | |
| Last | Trailing column | Any value — not imported |
Example row (one box):
0,Sarah Tan,91234567,sarah@email.com,Blk 10 Ang Mo Kio Ave 4,box-1,2,leave at door,extra
Example row (two boxes):
0,Wei Ming,98765432,wei@email.com,456 Jurong West Ave 1,box-1,3,box-2,6,no remark,extra
Tip: Place the CSV file in the
data/folder before runningimport. This command reads only from that folder.
Warning: The
importcommand only accepts CSV files. Files generated byexportare HTML summaries and cannot be imported back into Client2Door.
Examples:
import april-subscribers.csv— imports subscribers fromdata/april-subscribers.csv.import backup_2026_04.csv— imports another CSV file stored in the same folder.
Expected output: The output panel shows how many subscribers were imported successfully. If any rows are skipped, the output also lists the failed rows and the reason.
Clearing all entries : clear
Removes all subscribers from Client2Door.
Format: clear
Warning: This permanently deletes all subscriber data and cannot be undone. Run
exportbefore clearing if you may need the data again.
Expected output: The subscriber list becomes empty. The output panel shows: Address book has been cleared!
Exiting the program : exit
Closes Client2Door.
Format: exit
Expected output: The application window closes. All data has already been saved automatically.
Saving the data
Client2Door saves all data automatically to the hard disk after every command that changes data. There is no need to save manually.
FAQ
Q: How do I transfer my data to another computer?
A: Copy the addressbook.json file located in the data/ directory (in the same directory the Client2Door.jar file) over to the other computer in the same directory structure
Example: Client2Door.jar in now in the tp directory, the data directory in the same tp directory and addressbook.json should be in the tp/data/ folder.
Q: What happens if I accidentally run clear?
A: All data is permanently deleted and cannot be recovered from within the app. Use export regularly to keep a saved copy of your delivery data.
Q: Can two subscribers share the same box name?
A: Yes — box names are unique per subscriber, not across all of Client2Door. Two different subscribers can each have a box named box-1.
Q: Why is my export failing?
A: The export command requires at least one driver to have been assigned via assign first. Run assign and then retry export.
Q: What happens to driver assignments if I run assign again?
A: All previous driver assignments for every subscriber are replaced. The assign command always acts on all subscribers in Client2Door, regardless of the current view.
Known issues
- When using multiple screens, if you move the application to a secondary screen and later switch back to a single screen, the GUI may open off-screen. To fix this, delete the
preferences.jsonfile in your Client2Door folder and relaunch the app. - If you minimise the Help Window and then run
helpagain, no new window will appear. Restore the minimised window manually.
Command summary
| Action | Format | Example |
|---|---|---|
| Add | add n/NAME p/PHONE e/EMAIL a/ADDRESS b/BOX_NAME:MONTHS_SUBSCRIBED [r/REMARK] [t/TAG]… | add n/Sarah Tan p/91234567 e/sarah@email.com a/Blk 10 AMK Ave 4 b/box-1:2 |
| Edit | edit INDEX [n/NAME] [p/PHONE] [e/EMAIL] [a/ADDRESS] [r/REMARK] [t/TAG]… | edit 2 p/98887777 r/prefers afternoon delivery |
| Delete | delete INDEX | delete 3 |
| Find | find KEYWORD [MORE_KEYWORDS]… | find Sarah Wei |
| List | list | list |
| Mark | mark INDEX STATUS | mark 1 delivered |
| Filter | filter BOX_NAME [MORE_BOX_NAMES]… or filter d/DRIVER_NAME [d/MORE_DRIVER_NAMES]… | filter box-1 or filter d/David Lim |
| Remark | remark INDEX r/REMARK | remark 2 r/leave at door |
| Add Box | addbox n/NAME b/BOX_NAME:MONTHS_SUBSCRIBED [b/BOX_NAME:MONTHS_SUBSCRIBED]… | addbox n/Sarah Tan b/box-3:4 |
| Edit Box | editbox n/NAME b/OLD_BOX_NAME [nb/NEW_BOX_NAME] [ex/MONTHS_SUBSCRIBED] | editbox n/Sarah Tan b/box-1 nb/box-2 ex/3 |
| Delete Box | deletebox n/NAME b/BOX_NAME [b/BOX_NAME]… | deletebox n/Sarah Tan b/box-1 |
| Assign | assign n/NAME p/PHONE [n/NAME p/PHONE]… | assign n/David Lim p/91234567 n/Priya Nair p/98765432 |
| Export | export [FILE_NAME.html] | export march-delivery.html |
| Import | import FILE_NAME.csv | import april-subscribers.csv |
| Clear | clear | clear |
| Help | help | help |
| Exit | exit | exit |
Appendix: Installing and Running Client2Door
This appendix walks you through installing Java and launching Client2Door for the first time, with step-by-step instructions for Windows, Mac, and Linux.
Step 1: Install Java 17
Client2Door requires Java 17. Follow the guide for your operating system below.
Windows
- Visit the Java 17 Installation Guide for Windows.
- Download the Java 17 installer (
.exefile). - Run the installer and follow the on-screen instructions.
- To verify the installation, open Command Prompt (
Win + R, typecmd, press Enter) and run:
You should see output like:java -versionjava version "17.x.x".
Mac
- Visit the Java 17 Installation Guide for Mac.
- Follow the guide exactly — the specific JDK version prescribed matters on Mac.
- To verify, open Terminal (
Cmd + Space, typeTerminal, press Enter) and run:
You should see output like:java -versionjava version "17.x.x".
Linux
- Visit the Java 17 Installation Guide for Linux.
- Follow the instructions for your Linux distribution.
- To verify, open a terminal and run:
You should see output like:java -versionjava version "17.x.x".
Step 2: Download Client2Door
- Go to the Client2Door releases page.
- Download the latest
Client2Door.jarfile.
Step 3: Set up your folder
Create a dedicated folder for Client2Door and place the .jar file inside it. This folder will also store your subscriber data automatically.
| OS | Example folder path |
|---|---|
| Windows | C:\MyBusiness\Client2Door\ |
| Mac | ~/Client2Door/ |
| Linux | ~/Client2Door/ |
Step 4: Launch the app
Open a terminal and navigate to your folder using the cd command, then run the app.
Windows (Command Prompt):
cd C:\MyBusiness\Client2Door
java -jar Client2Door.jar
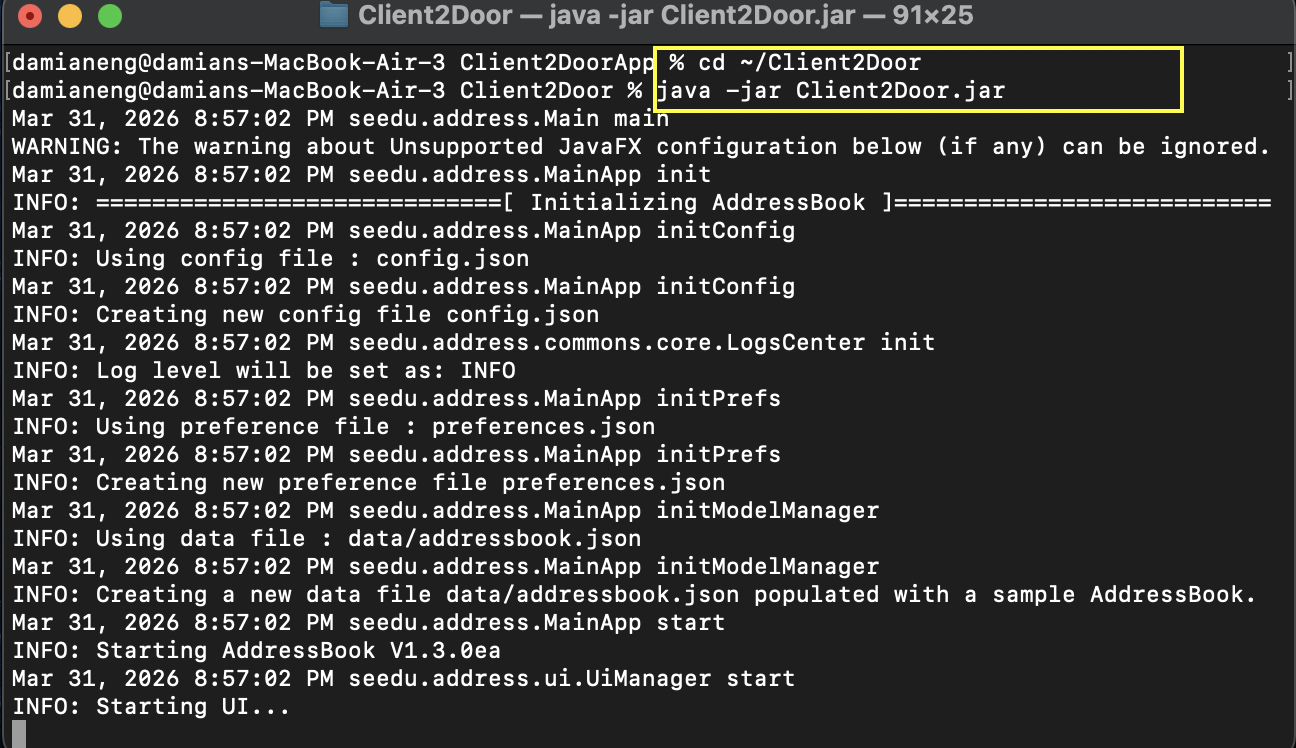
Mac / Linux (Terminal):
cd ~/Client2Door
java -jar Client2Door.jar
The Client2Door window will appear within a few seconds, preloaded with sample data so you can explore the interface before adding your own subscribers.
Tip: You can create a simple script or shortcut to run these two commands automatically each time you want to launch the app.